1. Overview
assentGO is a mobile approval app for ERP transactions and documents. Your ERP team configures an API endpoint for your ERP system; then users can approve/check/release items on mobile from anywhere.
| Capability | What it means |
|---|---|
| Multi‑ERP / Multi‑Company | Add multiple “Identities” (connections) and switch anytime. |
| Role‑based actions | Users see only the activities (Approve / Check / Release) assigned by ERP roles. |
| Branch-wise work | Select company & financial year, then branch (GSTIN/unit) for accurate approval workflow. |
| Drill‑down details | Open a transaction, view product/details, then approve from mobile. |
2. Requirements
- Android or iOS phone with internet connectivity.
- ERP API endpoint accessible from the phone network (public URL or via VPN, as configured by your IT).
- User credentials created in the ERP / approval system.
- Organization ID and (optional) User ID format as per your ERP mapping.
3. First-Time Setup
First-time users typically do these steps in order:
- Add an Identity (ERP connection) with endpoint + Org ID.
- Login with User ID + Password.
- Select Company and Financial Year.
- Select Branch (GSTIN/unit).
- Open Activities and process approvals.
4. Identities (ERP Connections)
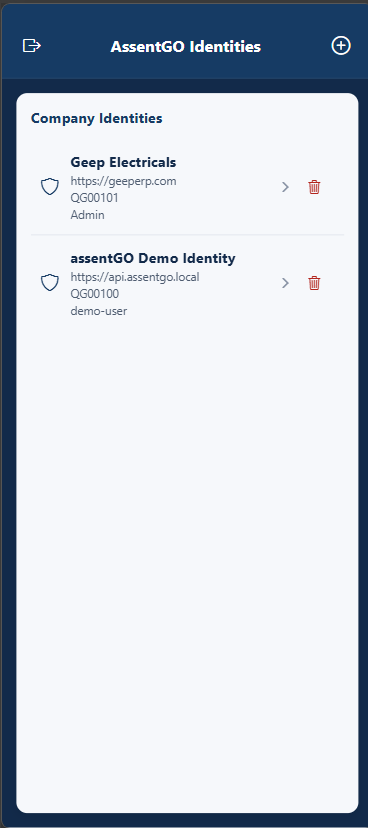
An Identity represents one ERP connection (API base URL + organization mapping). Your customers can add multiple identities (e.g., multiple companies or environments).
4.1 View existing Identities
- Open assentGO Identities screen to see saved identities.
- Each identity card shows name, endpoint, organization ID, and current user label (if saved).
4.2 Add a new Identity
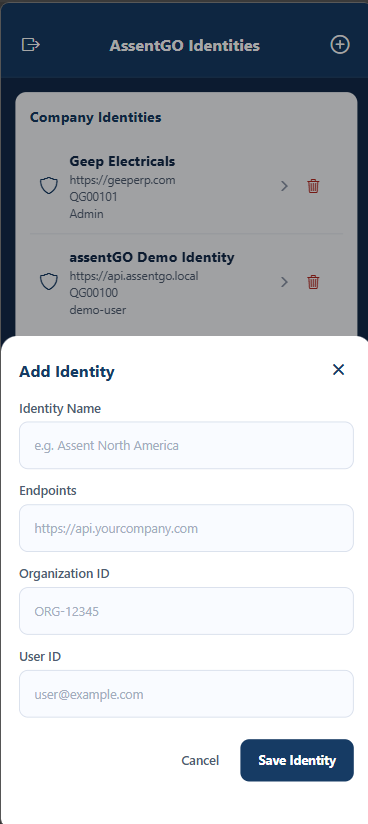
- Tap the + icon at top-right.
- Enter:
- Identity Name – e.g., Geep Electricals (Prod)
- Endpoint – e.g.,
https://api.yourcompany.com - Organization ID – as provided by your ERP admin
- User ID – optional default user (you can still login with another user)
- Tap Save Identity.
https://api.company.com not https://api.company.com/api/v1/approve.
4.3 Delete an Identity
- On an identity card, tap the trash icon.
- Confirm deletion (if prompted).
5. Login
After selecting/adding an Identity, you can login.
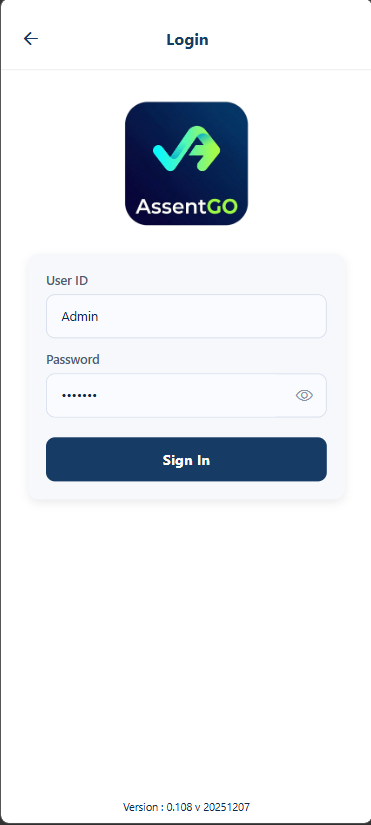
- Enter User ID (as assigned in ERP approval setup).
- Enter Password.
- Tap Sign In.
6. Select Company & Financial Year
After login, the app displays the company list available to your user, along with financial year entries. Choose the correct company and FY to load the appropriate pending approvals.
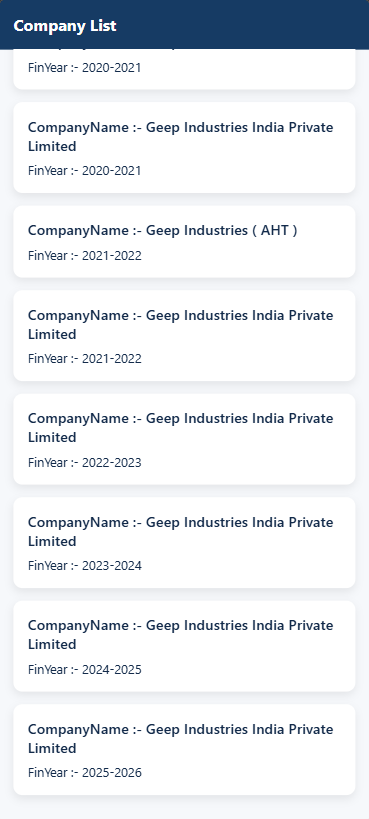
- Scroll to find your company.
- Confirm the Financial Year (e.g., 2024–2025).
- Tap the company card to continue.
7. Select Branch
Branch selection is typically unit-wise or GSTIN-wise, depending on how the ERP is configured. Select the correct branch for approvals.
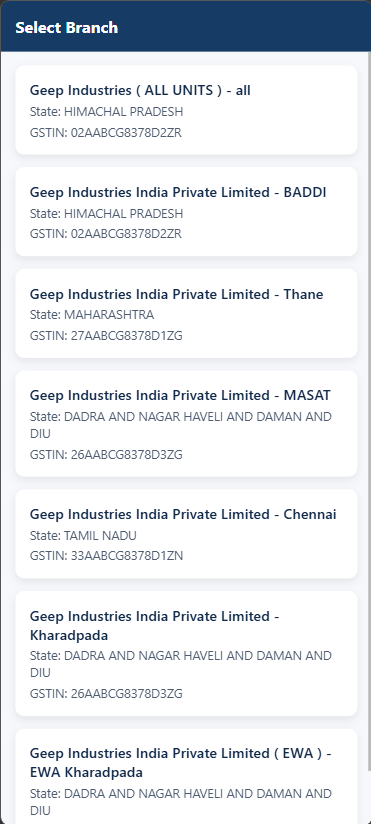
- Choose one branch (or ALL UNITS if available and permitted).
- Verify State and GSTIN (helps avoid wrong approvals).
- Tap to proceed.
8. Home & Navigation
After selecting company and branch, you will land on the home screen. Use the bottom tabs to navigate.
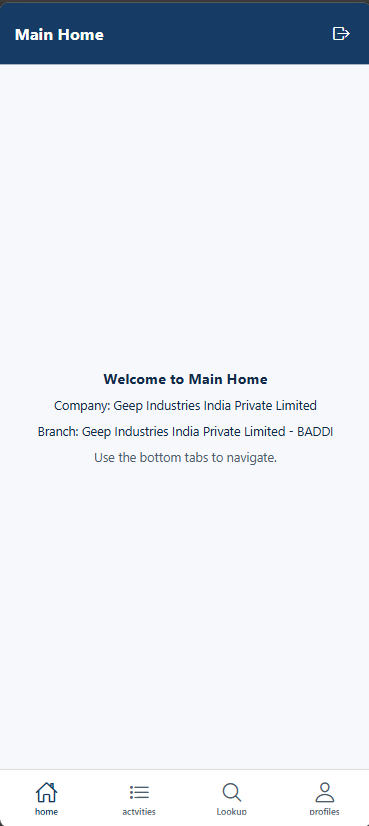
| Tab | Purpose |
|---|---|
| Home | Shows current company/branch context and quick guidance. |
| Activities | Your approval worklist grouped by activity type. |
| Lookup | Optional search/lookup area (may be enabled in your deployment). |
| Profiles | Your profile info and settings. |

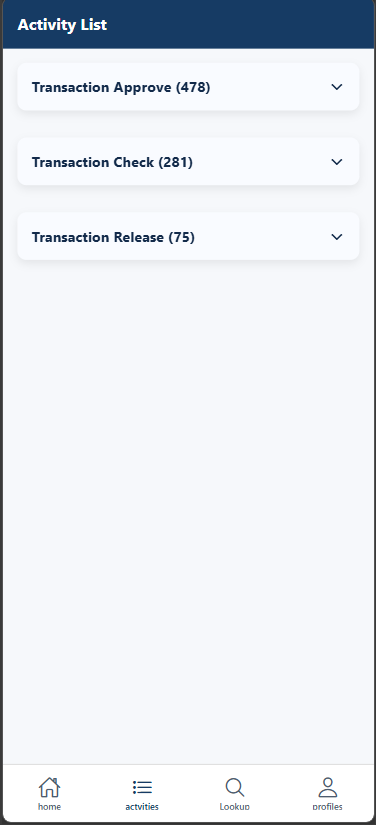
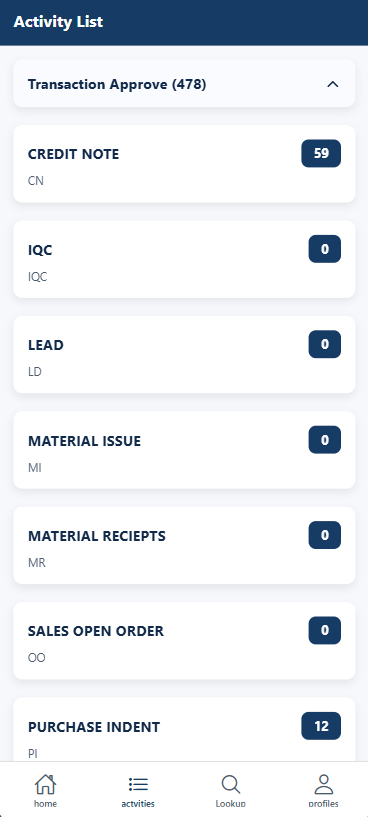
9. Activity List (Approve / Check / Release)
The Activity List shows the major queues assigned to your user (example: Transaction Approve, Transaction Check, Transaction Release). Each item indicates how many documents are pending.
9.1 Understanding counts
- Counts on the right represent number of pending items for that document type.
- If a count is 0, there are no pending items.
- Counts may change after refresh or after you approve items.
10. Work on Transactions
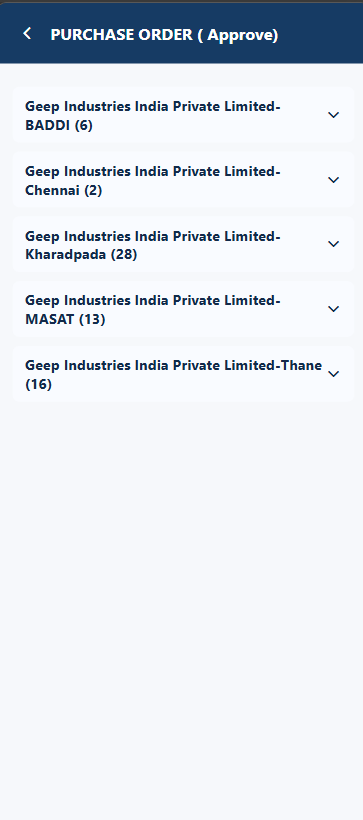
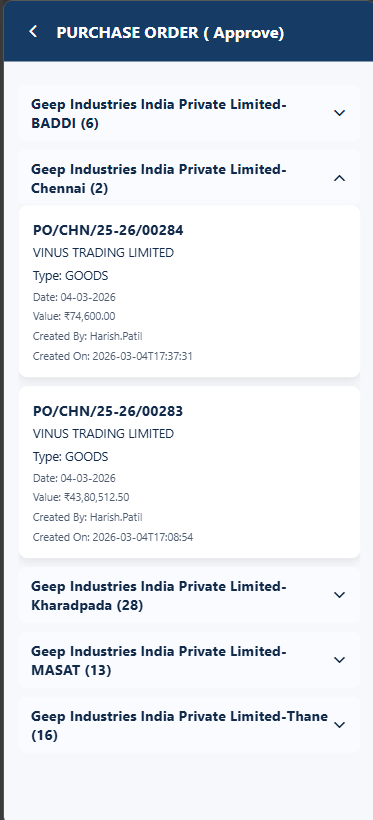
When you choose an activity + document type (example: Purchase Order (Approve)), the app groups items by branch/unit. Expand the branch section to view transactions.
10.1 Open a transaction
- Expand the relevant branch.
- Tap a transaction card to open details.
- Review header details (document no, party, type, date, value, created by, created on).
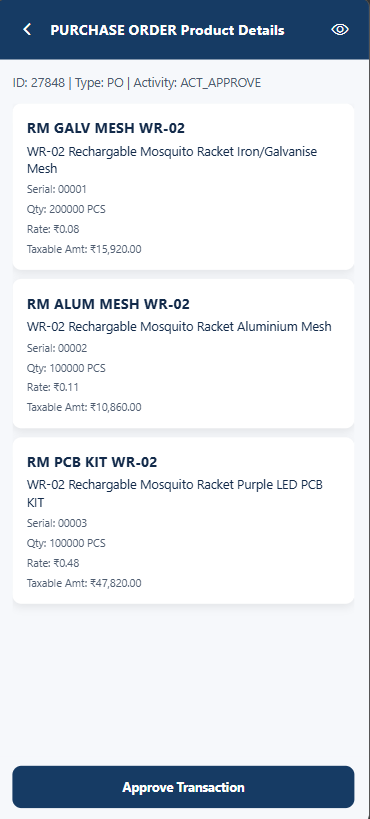
10.2 View item / product details
Transaction detail screens may provide a product/details view. Use the eye icon (if shown) to toggle viewing modes.
10.3 Approve a transaction
- Confirm details and quantities/amounts are correct.
- Tap Approve Transaction.
- Wait for the success message (or error message).
- Return to the list and verify the count reduces.
10.4 Refreshing / syncing
- If counts do not change immediately, use app refresh (pull-to-refresh if enabled) or re-open the activity list.
- If your ERP requires approval comments or multi-level approvals, the app will show the required fields/actions (as configured).
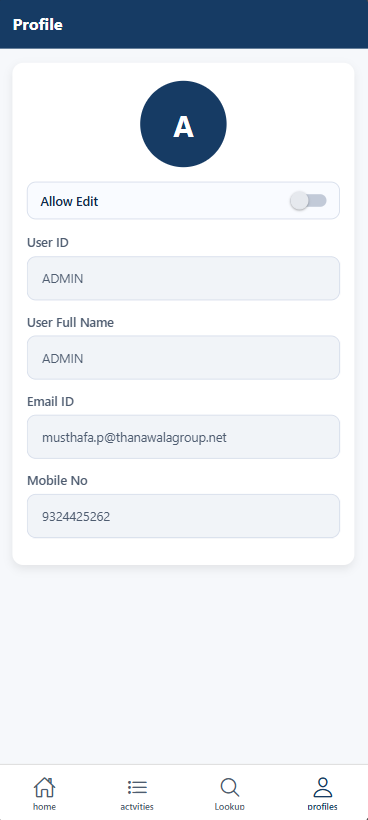
11. Profile
The profile screen shows your user details. If Allow Edit is enabled, you may update editable fields as permitted.
- User ID – your login identifier.
- User Full Name – displayed name.
- Email ID and Mobile No – contact details (editable only if allowed).
12. Logout
Use the logout icon (top bar) to sign out safely, especially on shared devices.
- Go to Home (or top-right menu).
- Tap the logout icon.
- Confirm if prompted.
13. Troubleshooting
| Issue | What to do |
|---|---|
| Cannot login / Invalid password | Verify correct Identity selected (Prod vs Test). Re-enter User ID (case-sensitive if configured). If still failing, ask ERP admin to reset password / verify user role mappings. |
| No companies or branches shown | User may not have access, or Org ID mapping is wrong. Confirm Organization ID and endpoint with ERP admin. |
| Counts not updating | Refresh the screen. If multiple approvers exist, another user may have processed the item already. If issue persists, check network and API connectivity. |
| Endpoint not reachable | Check internet/VPN. Confirm the API URL is accessible from mobile network. Try on Wi‑Fi vs mobile data. |
| Approval action fails | Note the error message and time, then contact support. ERP may require mandatory fields (remarks, attachments, etc.) or the document may be locked/modified. |
14. Security & Best Practices
- Use strong passwords; don’t share credentials.
- Always verify Identity, Company, FY, and Branch before approving.
- Logout on shared devices.
- Keep your phone locked with PIN/biometric.
- Use VPN if your organization mandates private network access.
15. Support Information
Provide the following details when raising a support request:
- Identity name and Endpoint URL
- Organization ID
- User ID
- App version (shown on login screen footer)
- Time of issue and screenshot of error (if any)
- Document number / transaction ID (if related to approvals)